VoiceBase + Zapier
Connect your apps to VoiceBase Speech Analytics using Zapier
Zapier simplifies the integration and automation of 1000+ apps. You can use Zapier to connect VoiceBase with dozens of platforms you want to populate with call data: Twilio, AnyMeeting, Box, Google Drive, RingCentral and more — all without writing a single line of code.
How it Works
- Pass recordings from any Zapier supported app to VoiceBase for transcription & analytics
- Send VoiceBase results to any Zapier supported app
- Minimal setup (~1 hour integration time)
- Turnaround time in just minutes
- Easily automate workflows between your favorite apps!
How To Create a VoiceBase Zapier Action
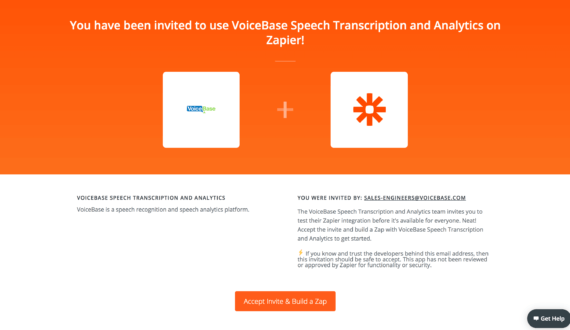
1. Use the VoiceBase App Invitation Link to get started.
Click here to get started with the VoiceBase Zapier Private App.
2. Sign In or Sign Up
To start using Zapier, you need a Zapier account. Either sign in or sign up for an account using your email address. If you are creating a new account, do that first then come back and click on the VoiceBase Zapier App Invitation again and proceed by logging in.
3. Create a Zap.
Once logged in, click on the ‘Make a Zap’ link on the top right of the screen.

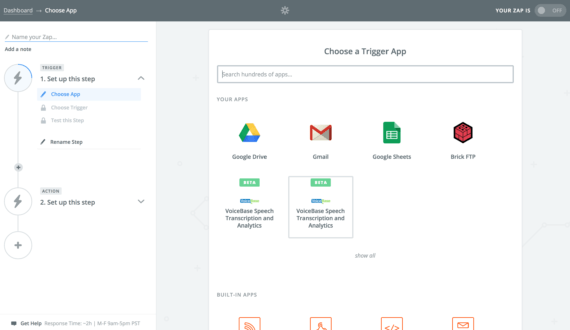
4. Choose Native App Trigger and VoiceBase action.
Choose a trigger app you would like to have sync with your VoiceBase app. In the example below, we chose Google Drive. Keep in mind that not all native apps have file support, but most storage apps like Google Drive, Amazon S3, and SugarSync will work. Because VoiceBase takes in audio files the trigger app must have file support. You will see some additional option fields for the trigger app. For this example we will be using ‘New File in Folder’ for a Google Drive. This means whenever a new file is added to a specific folder in my Google Drive account, upload that file into my VoiceBase account. Click ‘Save + Continue’ to proceed.
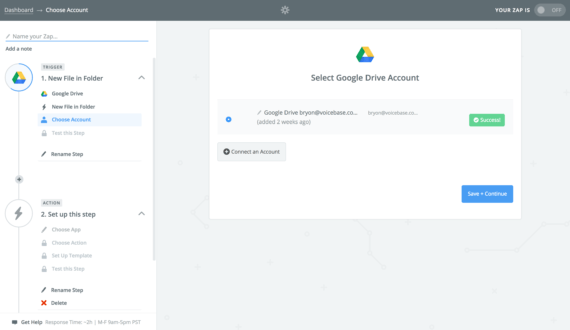
5. Connect Your Trigger App
For this example we logged into a Google Account to give Zapier access to Google Drive. Once you have logged in successfully you will be able to continue. Different apps will have slightly different Trigger App Authentication steps.
6. Choose Your Google Drive Folder
Use the dropdown to choose your Google Drive folder.
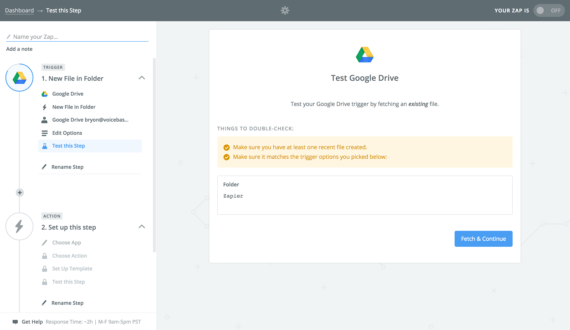
7. Test Google Drive Trigger
First add a sample audio file to the Google Drive Folder you chose in step 6. Then click Fetch & Continue.
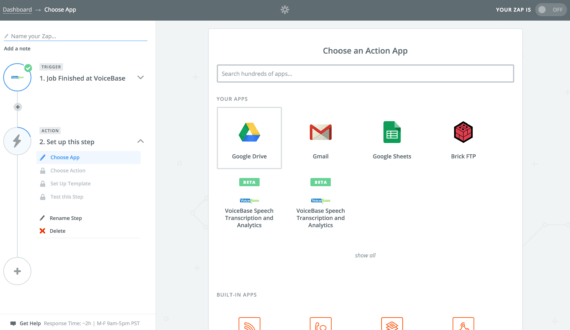
8. Choose VoiceBase as Your Action
Use the search to find VoiceBase Speech Transcription and Analytics Action.
9. Authenticate With VoiceBase
Enter your bearer token here to authenticate with VoiceBase. To get a bearer token request VoiceBase API Access here.
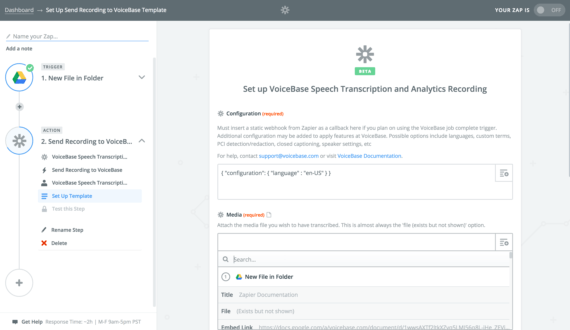
10. Choose VoiceBase Action Items
The first required field is a VoiceBase configuration. You can create a custom configuration or use the default configuration. VoiceBase has many different features that can be defined here. To quickly generate a custom configuration use the Helper Tool at the top of this page. For a more in depth look at VoiceBase features you can check out the VoiceBase Documentation.
*The Media field is also required. You should choose ‘File (exists but not shown)’ or a url to the recording.
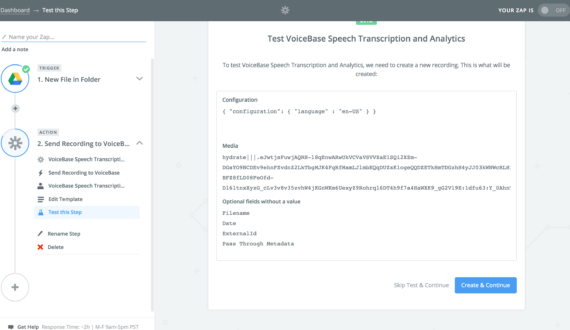
11. Test VoiceBase Action
On this screen click ‘Skip Test & Continue’. The Zap will still work even though you skip the test.
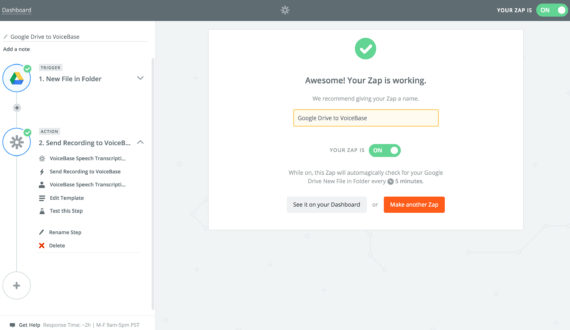
12. Name Your Zap and Turn it on!
Congrats! Just name your Zap, turn it on, and you’re integrated!
How to set up a VoiceBase Zapier Trigger
1. Use the VoiceBase App Invitation
Use this link to get the VoiceBase Zpaier Private App Invitation.
2. Sign up and Sign in
To start using Zapier, you need a Zapier account. Either sign in or sign up for an account using your email address. If you are creating a new account, do that first then come back and click on the invitation link again and proceed by logging in.
3. Create a Zap
Once logged in, click on the ‘Make a Zap!’ link on the top right of the screen.
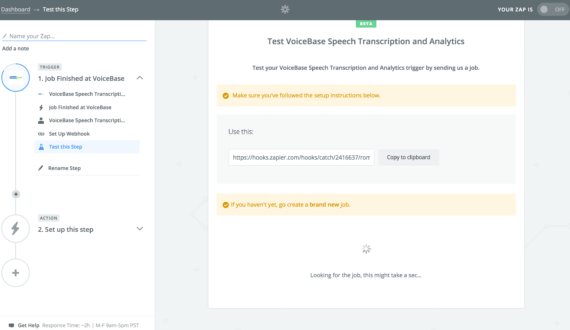
4. Choose VoiceBase Trigger
5. Choose Job Finished at VoiceBase
6. Authenticate with VoiceBase
Enter your bearer token here to authenticate with VoiceBase. To get a bearer token, access it in your developer portal once you have been signed up with VoiceBase.
7. Copy your Webhook and add it as a callback in your upload configuration for any jobs which you would like the Zap trigger to listen to.
*Important* – If you plan to use the Zapier action and trigger you will need to add this webhook to configuration when setting up your VoiceBase action.
Your action configuration might look like this,
{ “configuration”: { “language” : “enUS”, “publish”: {“callbacks”: [{“url” : “Enter-Webhook-Here”,”method” : “POST”,”include” : [ “transcripts”, “keywords”, “topics”, “predictions”, “metadata” ]}]}}}
8. Once you click “Ok, I did this”, Zapier will wait for a callback to be sent to the webhook you were just provided.
You could run a job through VoiceBase now with the Zapier webhook set and Zapier will verify it is receiving the VoiceBase callback. Alternatively, to skip this step, send any http request to that webhook. The simplest way would be to simply enter the webhook into a web browser.
9. Select your action app
In this example we will use Google Drive
10. Choose action
In this example we will Create File from Text to create a .txt file of the VoiceBase transcript. Different action apps will have different actions to choose from.
11. Authenticate with Google Drive
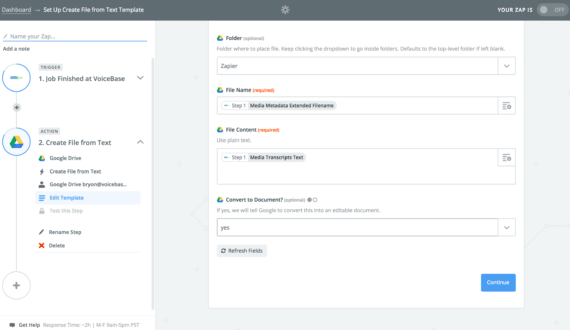
12. Choose action options
Different actions will have different options. For this example we chose a folder where the transcript will be created in Google Drive, we named the transcript by the original recording’s filename, we chose the text version of the transcript from VoiceBase (srt and others are also available), and we chose convert to document yes. Here is some general information about the action option dropdown values from VoiceBase, The most commonly used metadata values are:
– Media Metadata Extended Filename (The recording’s filename)
– Media Metadata Extended Date
– Media Metadata External ID (Unique ID for the job)
Note: In order to use those values, they must be added while the recording is being sent to VoiceBase. That can be setup in the VoiceBase action in Zapier, or if jobs are being sent to VoiceBase outside of Zapier, any extended metadata fields will be passed through into this dropdown. The most commonly used values are:
– Media Transcripts Text (transcription text)
– Media Transcripts SRT (transcript srt)
– Media Transcripts Webvtt (transcript webvtt)
13. Click Skip Test and Continue
14. Name your Zap and turn it on!
Get the installation quick start guide
Download the guide to get started building your VoiceBase + Zapier solution.
Top Takeaways
- Automatic Speech-To-Text & Keyword Extraction
- PCI, SSN & PII redaction
- Custom speech analytics for your use case